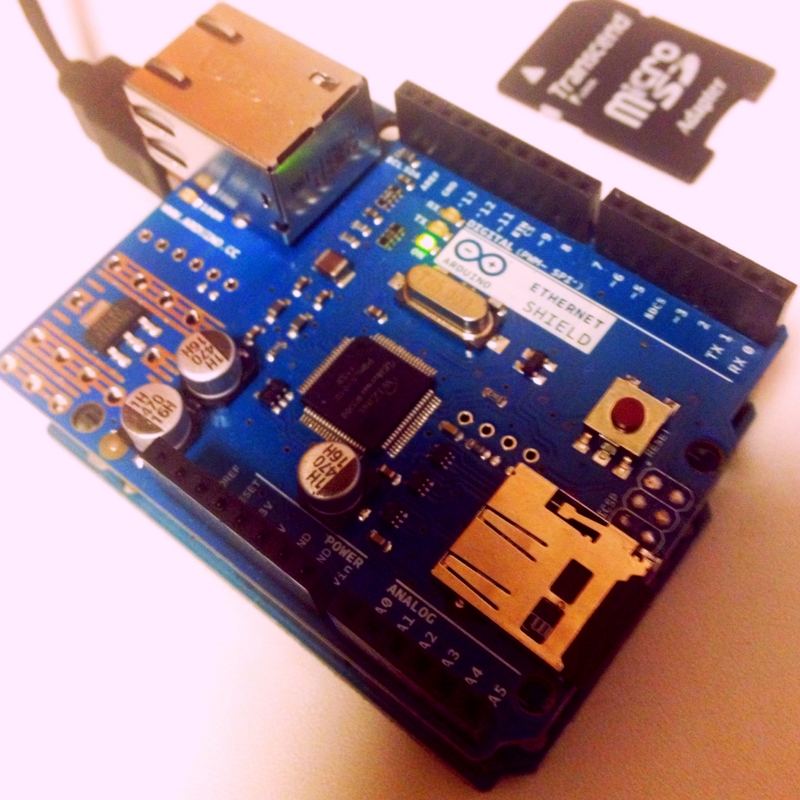
Arduino Ethernet Shield R3でSDカードにデータを書いてみる(3)
今回こそArduino UNO + Ethernet Shield + SDカード

でSDカードにデータを書いてみます、と思ったらリファレンススケッチがあるんですね。
#include <SD.h>

// On the Ethernet Shield, CS is pin 4. Note that even if it's not
// used as the CS pin, the hardware CS pin (10 on most Arduino boards,
// 53 on the Mega) must be left as an output or the SD library
// functions will not work.
const int chipSelect = 4;
とあり、SDカードライブラリを使っていきます。
また、Ethernet Shieldでは、ピン4がCS(チップセレクト)で、
もしCSとして使わないとしても
- ハードウェアCSピン10(Megaではピン53)をOUTPUT設定にする
- またはSDカードライブラリ関数を使わない
ように注意してねって書いてます。
setup()では
void setup()
{
 // Open serial communications and wait for port to open:
  Serial.begin(9600);
   while (!Serial) {
    ; // wait for serial port to connect. Needed for Leonardo only
  }


  Serial.print("Initializing SD card...");
  // make sure that the default chip select pin is set to
  // output, even if you don't use it:
  pinMode(10, OUTPUT);

  // see if the card is present and can be initialized:
  if (!SD.begin(chipSelect)) {
    Serial.println("Card failed, or not present");
    // don't do anything more:
    return;
  }
  Serial.println("card initialized.");
}
となっており、
- シリアル通信の開始
- ハードウェアCSピン10を出力設定に
- SDカードの初期化
と前の注意に沿いながらセットアップしてます。
実際の処理を行うloop()では、
void loop()
{
  // make a string for assembling the data to log:
  String dataString = "";

  // read three sensors and append to the string:
  for (int analogPin = 0; analogPin < 3; analogPin++) {
    int sensor = analogRead(analogPin);
    dataString += String(sensor);
    if (analogPin < 2) {
      dataString += ",";
    }
  }
とここまででアナログ0~2ピンのデータを読み、1行の文字列データを作っています。
ここから
  // open the file. note that only one file can be open at a time,
  // so you have to close this one before opening another.
  File dataFile = SD.open("datalog.txt", FILE_WRITE);

  // if the file is available, write to it:
  if (dataFile) {
    dataFile.println(dataString);
    dataFile.close();
    // print to the serial port too:
    Serial.println(dataString);
  }
  // if the file isn't open, pop up an error:
  else {
    Serial.println("error opening datalog.txt");
  }
}
と
- FileオブジェクトdataFileを生成し、SD.openでdatalog.txtというファイルを参照
- SD.openがちゃんと成功し、datalog.txtファイルが開けていることを確認
- 開けていれば
- 先ほどのアナログピンのデータ(文字列)をファイルに書き込む
- ファイルを閉じる
- シリアルポートにもデータを書き込む
- 開けていなければ、エラーメッセージをシリアルポートに書き込む
という処理をしている模様です。
ソフトウェアの知識が浅いので、
オブジェクトとかクラスとかの解釈で完璧かどうかわからないんですが、
もし記事を読んで下さって間違いに気付いた方がいればコメントして頂けると嬉しいです。
書き込む文字列はアナログピンのデータを読まずに適当な文字列を入れて試してみました。
#include <SD.h>

const int chipSelect = 4;

void setup()
{
 // Open serial communications and wait for port to open:
  Serial.begin(9600);
   while (!Serial) {
    ; // wait for serial port to connect. Needed for Leonardo only
  }

  Serial.print("Initializing SD card...");
  // make sure that the default chip select pin is set to
  // output, even if you don't use it:
  pinMode(10, OUTPUT);

  // see if the card is present and can be initialized:
  if (!SD.begin(chipSelect)) {
    Serial.println("Card failed, or not present");
    // don't do anything more:
    return;
  }
  Serial.println("card initialized.");
}

void loop()
{
  String dataString = "Temp";

  File dataFile = SD.open("datalog.txt", FILE_WRITE);

  if (dataFile) {
    dataFile.println(dataString);
    dataFile.close();
    Serial.println(dataString);
  }
  else {
    Serial.println("error opening datalog.txt");
  }

  delay(1000);
}
結果として、SDカード内のDATALOG.TXT(なぜか大文字になってしまいました)とシリアルモニタに

というような感じでデータが書けています。ワオ。
これでセンサーで読んだ値をSDカードに書いていくこともできますし、
処理のログを書いていくこともできるようになりました。
次はせっかくなのでEthernetを使用してみたいと思います。